
Creating Your First Account
This quick-start guide walks you through creating a new account in Timequip and inviting your team.
Create the account
- Open Account Settings and choose New Account.
- Enter a clear account name for your organization, team, or client.
- Click Create Account. After creation, Timequip selects the new account and returns you to the main app.
Invite colleagues
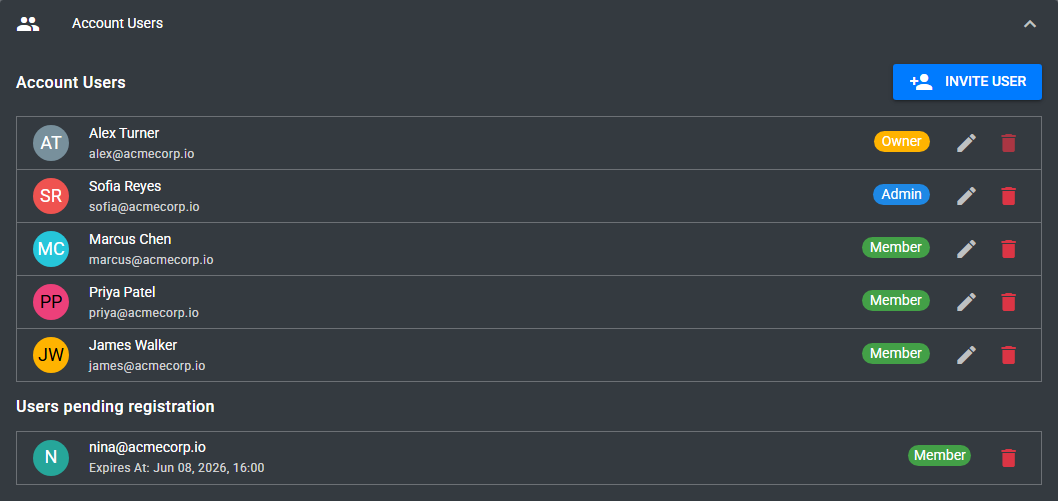
- Open the Account Users panel.
- Click Invite User.
- Enter an email address or an existing username such as @username.
- Send the invite. Pending invitations appear in the user list until they are accepted or removed.
Understand account roles
- Owner: Manages billing, account deletion, and account ownership. Each account has one owner.
- Admin: Manages users and projects when the account is operational.
- Member: Can access the account and participate in assigned projects according to project role.
For the full permission model, see Account Roles: Owner, Admin, Member.
Best practices
- Use one account per organization or client space that needs separate billing and membership.
- Keep pending invitations clean so seat usage stays accurate.
- Assign Admin only to trusted people who manage users or projects.